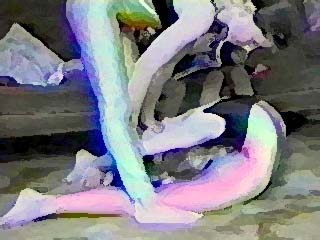
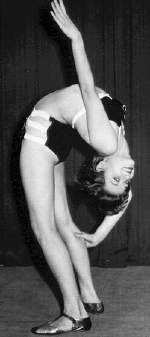
Backbends
Even if you've already read about backs and backbending I would like to say some important things (and reminders) if you're going to begin with backbending.
First of all when you're going to start bending your back backwards you will feel tension. Much more tension than you've ever felt before in your back. It might even feel like if it's going to break. Don't worry, it won't! It can also be painful in the beginning, but again that's only in the beginning of every exercise and it will disappear after a week or two. Just continue doing the exercises and don't be terrified. Your back isn't used to bend backwards this way, but as you can see it's much stronger than you think.
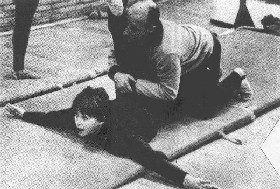
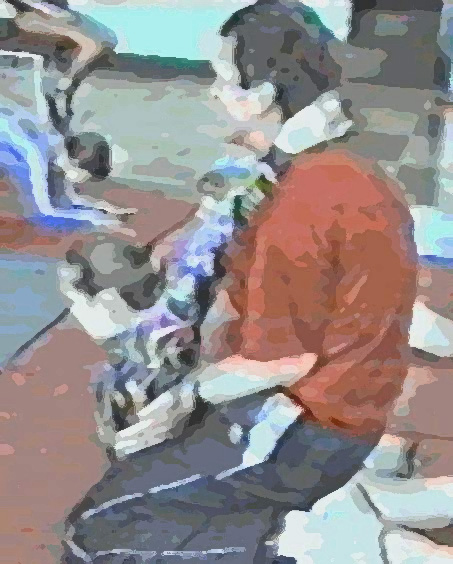
This is something some people doing these exercises might feel and have felt at every stage they've continued. This applies especially to those that do assisted stretches. When doing assisted backstretches there's a difference to other assisted stretches. The assistant should push you firmly into the position, hold for 15 seconds, let go a bit, pull in a bit further, hold for 30 seconds and continue to do like this until all repeats are done. In the last repeat the assistant should hold you for as long as you can stand. What is important is that when holding you can and should move, maybe twist if possible, since this will increase the stretch, but also loosen up your vertebrae. This will be difficult in the beginning, but you'll both see and feel the results and soon this will be a quite comfortable way of exercising.
As you can see the assisted stretches can be done in many more different ways than what you'll see here. If you see a possibility to vary the assisted stretches do so. The only limit is your own imagination. Especially those that suffer from hypermobility should use assisted backstretches much to achieve ultimate flexibility in the back, but also to get the stretches more stable. The assistant also prevents you from stopping at an early stage and it's important that you don't do that. There's also a reason why yogis, contortionists, dancers and gymnasts do assisted stretches and even if it might look extreme when not assisted don't give up. There's a reason. It's effective and not dangerous.
If you train together with a partner of a different gender, and you wish to be at the same lever at all times the male partner should be assisted. Then hold the stretches longer and to the same level as the female partner. Even if it might be quite uncomfortable it's only in the beginning. Don't be scared. It's normal. Instead see the benefits. You'll be doing backbends sooner than you'll think it's possible. This way you're prepared for it.
Another benefit with having an assistant except for assisting you in the stretching is that they can massage your back. When doing backbends and frontbends and especially assisted ones the assistant should massage the back back and forth since this relieves and stretches the vertebrae, but also will help you to get better.
Something I also recommend strongly is the use of the contortion barre when you can do more advanced backbends. It will make it possible for you to bend more and improve your strenght, but also improve your balance. Feel free to use your imagination to find which exercises could be best done using the contortion barre. For schematics of the contortion barre click here.
There's also another thing that probably is going thru your head and that is the thought "This is weird! It looks weird! It is weird! And anyone doing this is weird! They are hurting themselves!" Not true. Hundreds of contortionists, thousands of dancers and gymnasts, not to mention thousands of amateurs do this daily and they haven't felt better than since they started doing this. Feel free to ask them if you get a chance.
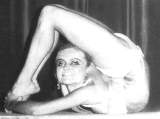
Trust me if I say that when you'll go into the position above the first time ...you'll scream. Not out of pain or agony, but of enjoying being able to be in this position for the first time and feeling what you'll feel. You will enjoy being in those positions very much and it will become a normal position - for you. We normally just never learn to be in it. You will be there sooner than you think :-)
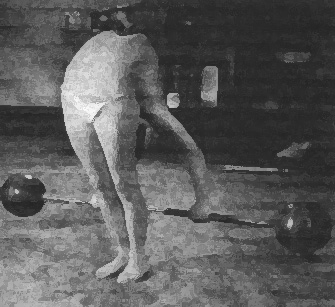
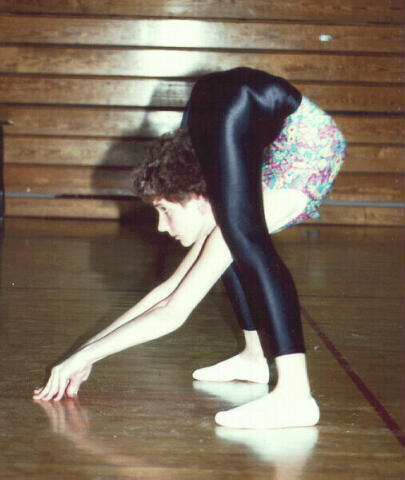
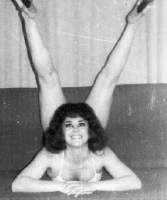
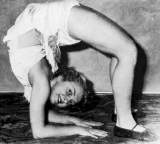
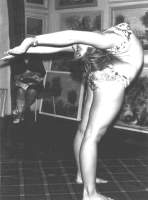
Exercise 1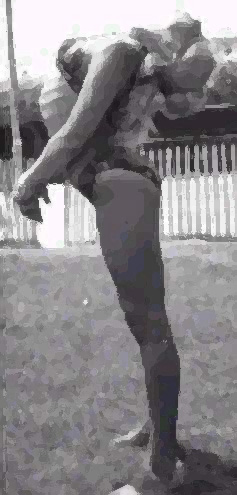
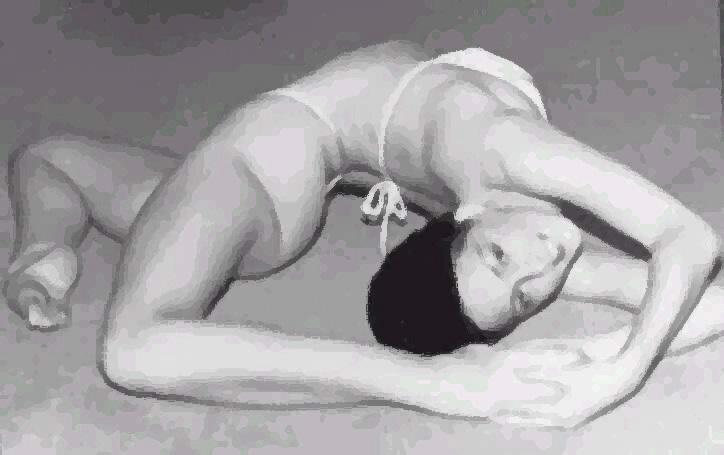
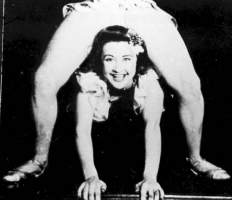
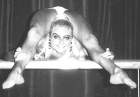
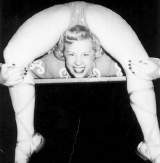
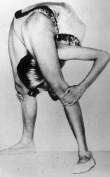
To the 1-2-3-4-5 count get a little further each count. As below and try to tighten up the bend. As shown in the picture is a good start.
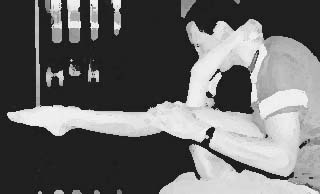
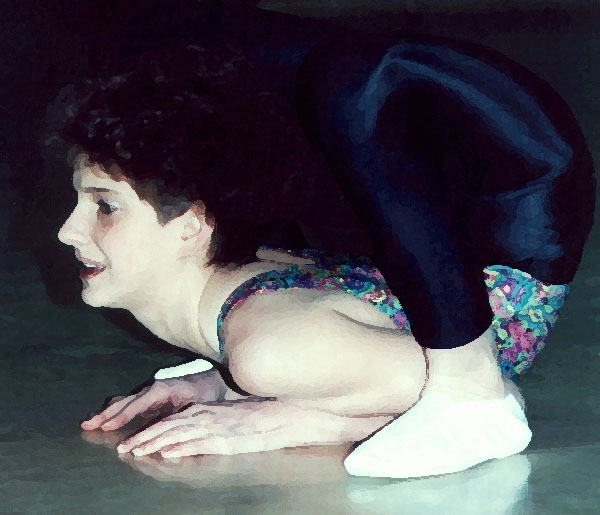
Holding the hands as in the picture will give you steadiness and will also help you with the bend as you arch the back.
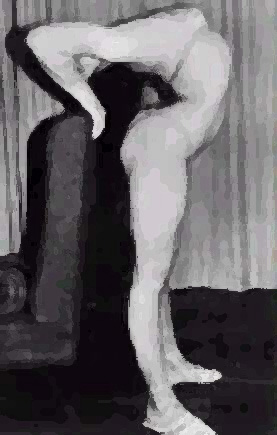
Initially, you will find it easier and get a better bend if you use furniture to hold on to. You might also prefer to stand in a doorway and reach back to grasp the door frame since this will give support. In your mind you are trying to tighten up the bend and get the head back to try to touch the seat and this will happen in time. The hands will give steadiness and will help you with the bend.
Arch the back and then reach the head back to try to touch the seat to the 1-2-3-4-5 count. Repeat 15 times.
Assisted: The assistant should push you backwards and downwards to help you arch the back. Relax the back during the assisted stretch.
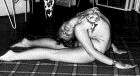
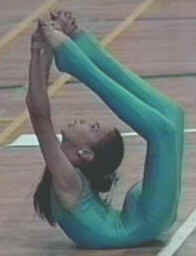
This is the ultimate goal you're working towards.
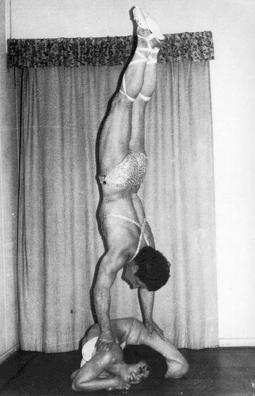
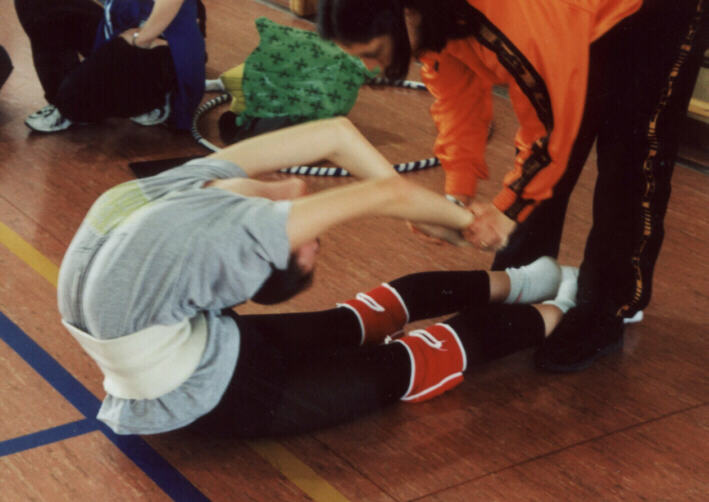
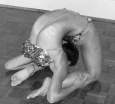
If you have difficulty with exercise 1 a good pre-exercise is to learn to do the splits. Then bend backwards as much as you can to the count of 1-2-3-4-5 and hold. Do 20 repeats with each leg. It will make things much easier when you begin with the backbends.
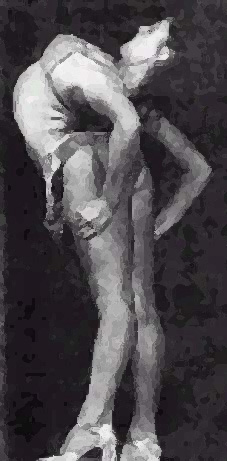
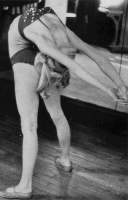
Exercise 2
Lie on the floor using the hands to assist with the bend, arch the back so that the head tries to touch the seat and tighten to a 1-2-3-4-5 count. Try to get the head towards the seat.
Assisted: Have the assistant push you backwards as shown above.
Now bring the feet up and to a 1-2-3-4-5 count arch the back a little more with each count trying to get the feet to touch the head and later, the shoulders. After each five count have a 5 count to relax in a loose position 5 and then repeat the exercise for 15 repeats.
Assisted: Have the assistant push you backwards.
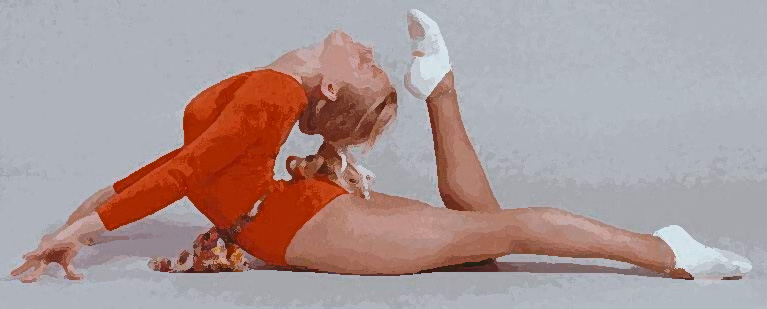

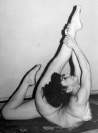
Bring one foot up and grasp it. To a 1-2-3-4-5 count arch the back a little more and pull the foot a little more across the shoulder. Take a 5 count to relax in the first position then repeat the exercise with the other foot. Do the exercise 15 times with each foot.
Assisted: Have the assistant push you backwards and pull your leg towards and across your shoulder.
We are working towards being able to grasp the foot which you will then pull across the shoulder as above.
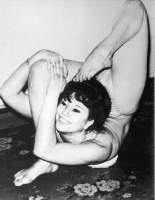
Variation 1
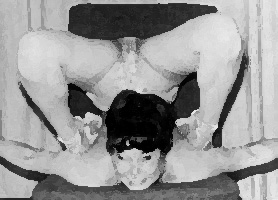
When you bend backwards try to get your feet under your armpits and stay in this position for as long as you can
Variation 2
Lie on the floor using the hands to assist with the bend, arch the back so that the head tries to touch the seat and tighten to a 1-2-3-4-5 count. Try to get the head towards the seat.
Bring your feet up and grasp it. To a 1-2-3-4-5 count arch the back a little more and pull the foot a little more across the shoulder. Take a 5 count to relax in the first position then repeat the exercise with the other foot. Do the exercise 15 times with each foot.
Grasp the feet and bend backwards.
As you bend backwards pull the feet down. Use them to push yourself more back. Hold there counting 1-2-3-4-5. Do this for 15 repeats. In the last repeat pull the feet down as much as you can and push backwards and stay like this for at leat 5 minutes. This exercise can be a bit painfull and difficult the first week. Don't give up. It will get better.
Variation 3

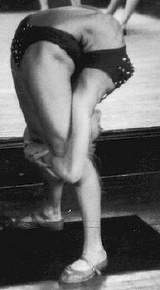
1. If you can reach back in a bend and grasp the legs at the knees pull into the bend to the 1-2-3-4-5 count.
Assisted: Have the assistant push you backwards.
2. If not, do as above in position 2 but tighten the bend by reaching back with the head to the 1-2-3-4-5 count. Try to get the head to the seat. If you are doing this position with ease change to position 1 as soon as you get supple enough. After each five count have a 5 count relax and repeat the exercise for 15 repeats. You can also use a wall to "walk" with your hands upwards and this way pulling yourself backwards. Assisted: Have the assistant push you backwards.
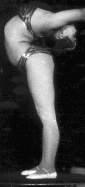
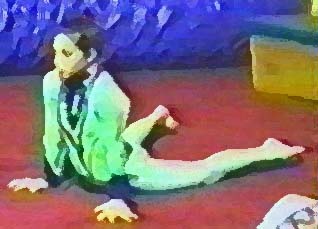
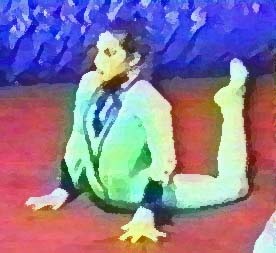
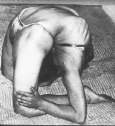
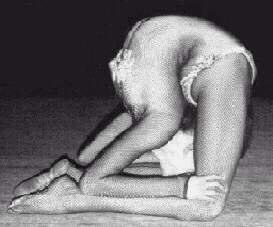
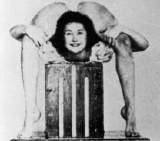
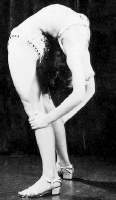
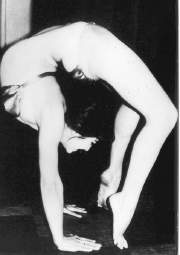
Exercise 3
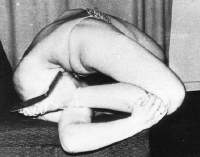
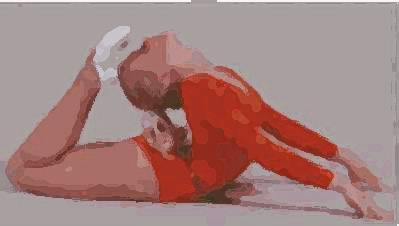
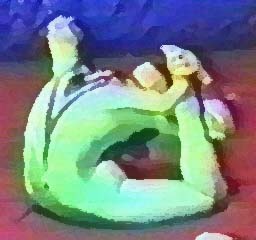
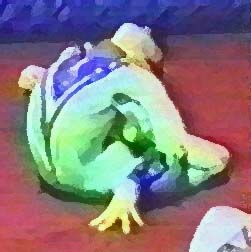
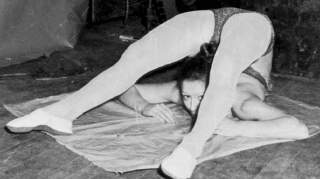
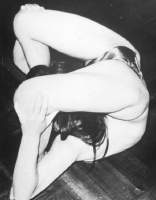
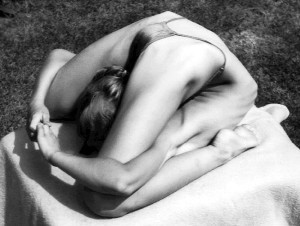
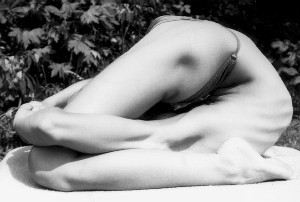
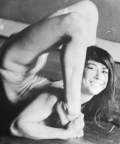
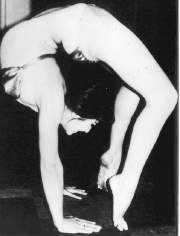
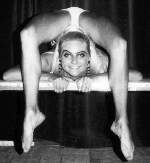
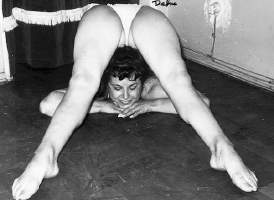
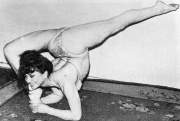
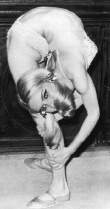
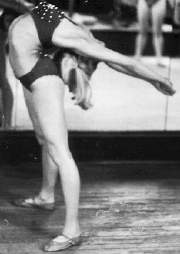
Lie on the floor and on your side and use lower leg for stability on the floor. Reach back and grasp the top foot as above or if possible as below with one hand and then with both hands and to the 1-2-3-4-5 count pull the foot/leg in to bend the back. Relax (you might have to let go of the foot) for a 5-10 count. Turn over to the other side and repeat the exercise with the other foot. Repeat the exercise until you have done it 15 times with each leg.
As your back gets more supple you will get the head over the leg and the leg well over the shoulder as above in the picture showing the leg and face positions.
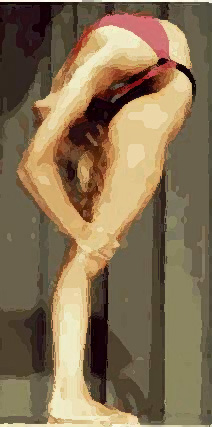
Exercise 4
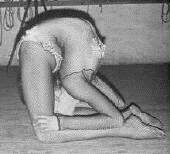
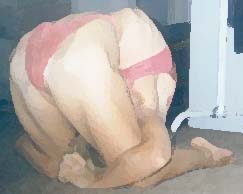
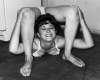
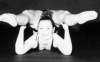
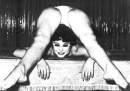
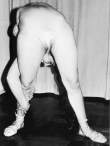
Kneel with legs well apart. Arch back to the floor trying to grasp the feet in a bend. Whatever the initial position to the 1-2-3-4-5 count pull the head in aiming to get a tighter bend. Adopt a relaxed position for a 5 count, then repeat the exercise 10 times. If you can't reach the feet do the exercise on a towel and slowly use it to get closer and closer to the feet until you can grasp them.
Later you will be able to get your hands onto the ankles like this.

Assisted: Have the assistant to push you further into the backbend.
Exercise 5
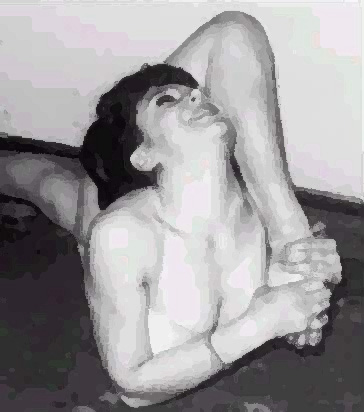
1. Backbend to the floor on the tummy and grasp both feet as position 17.
2. Pull up by straightening the legs into position 18 or as much as you can.
3. Hold one leg and place the rear leg knee to the floor as position 19. Slide the hands down the leg to above the knee and pull one foot over the shoulder alongside the head.
4. Bring the other leg into position 20 and grasp it. Pull in on the knees for the tightest fold you can in position 20. Relax onto the tummy to position 1 for rest of 5-10 count. Repeat the exercise 15 times.
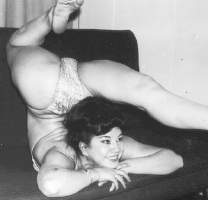
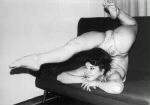
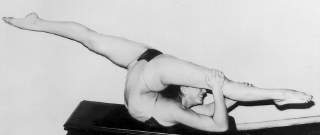
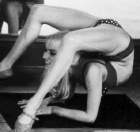
Exercise 6
This is a great back exercise because it relies on the own weight of seat and legs to tighten the bend. You will be completely relaxed in your. The cycling action will really tighten the bend as the front leg is pulling the back tighter and when the rear leg is brought forward the inertia of the moving leg will, again, tighten the bend. Because you are on your couch/chair, it is a good relaxing exercise where you will be in a comfort zone.
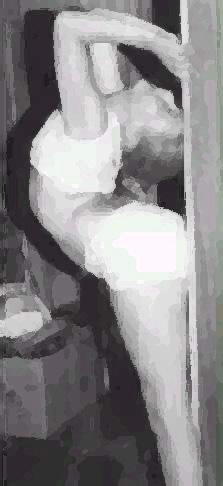
1. Stand with the legs close to the seat and facing away from where the chest is to be. Bend backwards to get the hands to the chair/couch/bed as in the picture above. You may need to bend the knees to do this.
2. Pivot at the arms and roll back onto the chest. This may be a little bit difficult in the beginning, but you will soon find out how to do it.
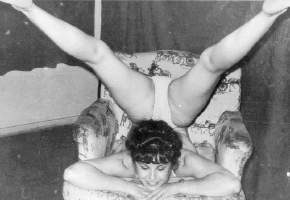
3. Then wriggle into position where the hands are at the front of the chair and the chin is also taking weight on the soft chair. Keep the legs reasonably straight and the back bent comfortably. You now have a solid base where you are on the chest, chin and arms in your soft chair/couch and this provides great stability. It is a position where you can relax because there is no balance requirement.
4. From this position allow the legs and back to bend and the feet will naturally fall to a position in front of the head and either above or below the head. Perhaps initially the position will be as above...
...but quickly more like this.

The next part is the bendy bit! Straighten both legs to the front then with a cycling style action bring one leg back as shown above then return it to the front with the other leg. Take the other leg back this time and return it to the front. Do this cycling action to the 1-2-3-4-5 count until you have achieved 10 cycles with each leg. Now take a 5 count rest in position (never go out of the backbend even if it might feel very tence – this will disappear very fast). 4. If you're on a couch or any other kind of furniture the "straight" leg can be bent trying to touch the floor to increase the stretch as in the picture to the right. If you are finding it pleasant then increase the repeats. Rest in any of the positions if necessary. It would be better if you could rest with your feet on something. You can see that the furniture item needs to be reasonably low to get a good rest position. Use the feet to rest the back. Repeat as many times as you are comfortable but I would say 15 minimum. The more repeats the better and you will get that back really loose.
Assisted: Let the assistant lightly push you deeper into the backbend. Be relaxed at all time.
After the exercise do frontbend exercise 4.
Variation only to be done when successfull with the above

1. Backbend onto your bed/couch/table.
2. Keeping in the chest stand position lift both legs at the same time up to near parallel with the floor. This will push your backbend tighter.
3. Now bring one leg up to and then return it to position 2. Do the same exercise with the other leg. Use the count as straight (1) bent (2) straight (3) other leg bent (4) etc. Do not do it quickly but make sure there is a good folding of the back as the legs are stopped out in the extended position. The weight of the leg being stopped and raised and at all times being totally relaxed in your back will do this. Do this 15 times for each leg. Assisted: Let the assistant lightly push you deeper into the backbend. Be relaxed at all time.
After the exercise do frontbend exercise 4.
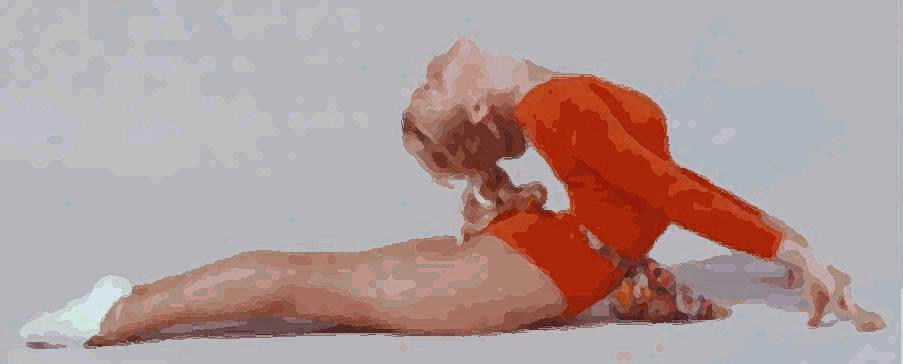
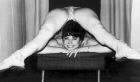
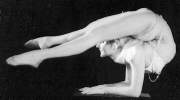
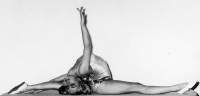
Exercise 7
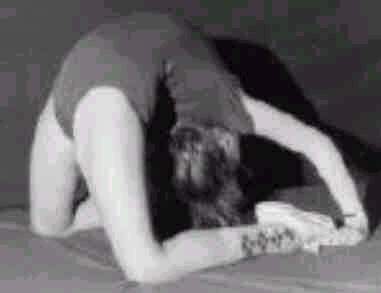
1. Continue on from the chest exercise. The feet are captured by the head and shoulders and this is the start and rest position for this exercise. Later there are other ways of getting here but at present you have one way.
2. Stretch the legs to the front and reasonably wide apart. Keep the legs straight and the bend will tighten.

3. Grasp one leg and bring the other leg up. To give better balance and to not require the leading leg to be kept straight by muscle control alone, shift the hands so that one is above the knee. Now the hand is holding the leg and there is less strain on the leg muscle.

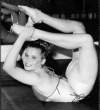
4. Now move the bent leg to an overhead split allowing the front leg to come off the ground as necessary depending on your split capability.

5. From this position you need to bring in the front foot to the position above because you need the foot on the floor to give stability as you bring the rear leg back from the split position.
6. Bring the back leg from the rear, bending it and place the foot to the floor.
7. Slide the feet to the front. Now grab the other leg and do the movement with the other leg into the splits. Return to position 6, pull the feet into position 1 and have a rest in this position for a 5 count. Do repeats as you feel like it.
Assisted: Let the assistant lightly push you deeper into the backbend in positions 1,2,6 and 7 and see to that the backbend is as deep in all other positions.
Preferrably the backbend soon should become a backfold. Stay relaxed at all time.
After the exercise do frontbend exercise 4.
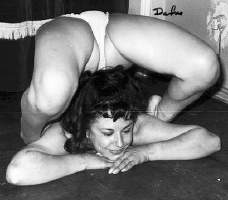
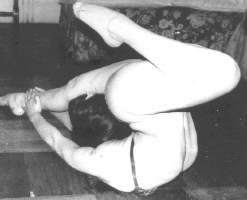
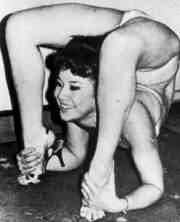
Exercise 8
Start from the chest position with feet in against the shoulders.
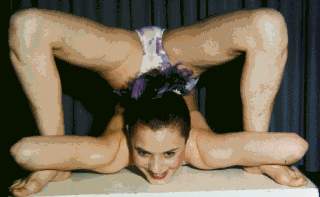
Using one hand put the same foot behind the arm linking the arm to hold the foot. At this stage the foot will still be flat on the floor. Do the same with the other foot. You will be as in the picture above.
Using the arms in a rearwards movement continue to move the feet towards the rear until the foot is in the armpit.The heels will come off the floor during this and you will only have the toe end of the feet captured.. You can do also do this in the chair now when doing backbend exercise 5.
Variation 1 to be done when more advanced and successfull with all backbend exercises

1. Stretch out in a backbend on the chest

2. Pull your feet in to the shoulders with your hands...

3. ...and slide the feet to the rear.
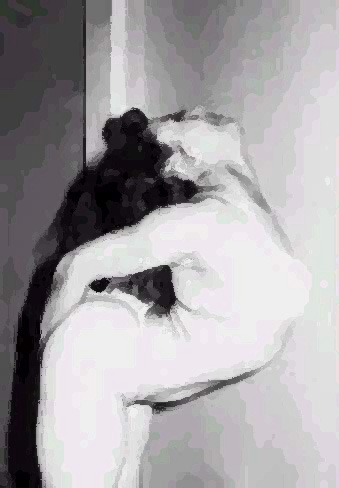
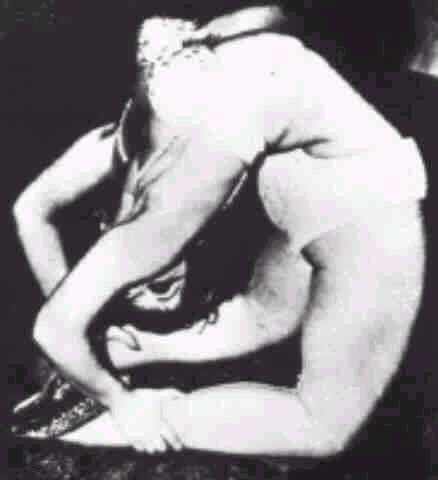
4. Now grasp the knees and pull in hard. Getting the hands to the knees allows you to pull the knees in lots and the head through the legs.
5. Finally pull in even more by interlocking your hands around your thighs. The more the better. This way you'll get the bend as tight as possible and holding your hands will make it possible to hold the position steadier.
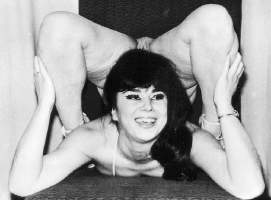
Advanced after doing position 5: Put one arm thru your legs and get your thigh under your armpit. Do the same with the other arm and pull yourself even further until you can’t go any further.
Both: Relax in position 1 and repeat 30 times. In repeat 30 relax and stay in position 5 for as long as you can.
Assisted: The assistant can assist you in getting the head and shoulder through the legs.
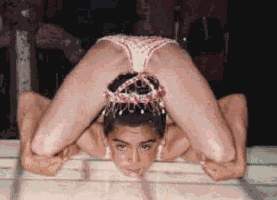
Variation 2 to increase the stretch in position 4
This exercise will make the triplefold even more comfortable since it stretches the muscles as much as possible in this position. This might be painfull the first week you do it. Just don't give up.
Go back to position 3.
Now lean to the right (or left if you prefere it). Your knee must lie on the floor. Stay here for a count of 1-2-3-4-5. This is the secret of doing deep triplefolds good.

Now lean to the other side the same way as before. Hold for a 1-2-3-4-5 count.
Return to the original position, the triplefold. Repeat this sequence at leat 30 times.
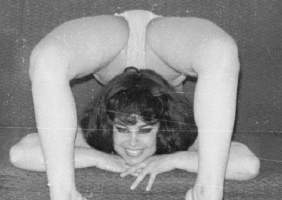
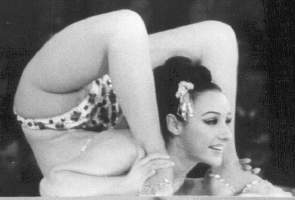
Exercise 9
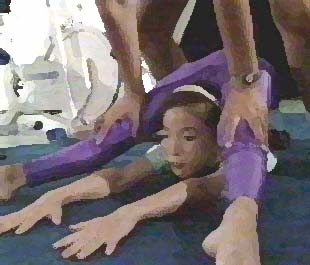
1. In this exercise you'll be doing a kneeling back bend. Kneel with legs well apart. Grasp the legs in as tight and bend as much as you can.
2. Hands to the legs as in position 1aiming to finally get to the knees as in position 2.
3. To the 1-2-3-4-5 count pull the head in aiming to get the head between the thighs and the seat firmly to the shoulders as in position 3. Adopt a relaxed position for a 5 count, then continue to 4.
4. If you're able interlock your arms around your legs and relax for at least a 5 count, then repeat the exercise 15 times.
Assisted: Have the assistant push you deeper into the backbend. If you can do a backbend as deep as in position 3 have the assistant push you more firmly into the backbend.
Variation to be done only when successfull with the above
4. Backbend on your knees with your thighs vertical

5. Now slide your hands forward through the legs. Repeat the exercise 25 times beginning from resting in position 1 to position 5 and try to stay in the position for as long as possible. At this level to achieve position 5 you might need assistance in the beginning. Have the assistant draw your hands through the legs until you can have the armpits on your thighs.
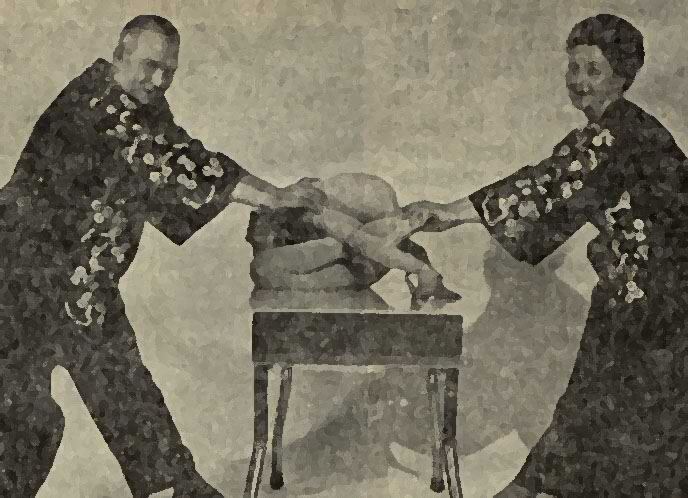
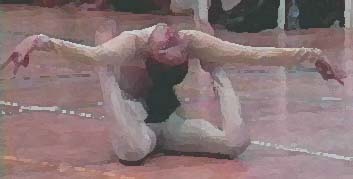
Tip. If you have two persons assisting you in position 5 try this. Let helper 1sit on your hip and pull up your feet using your body as a lever til the feet are at the height of the hip. This will pull you down hard in a deep fold and stretch your thighs to the utmost. At the same time helper 2 has her feet on your thighs while pulling your arms towards her slightly uppwards. This will make the fold even deeper. Also try to do the fold at different vertebrae to get as many of them as possible supple. Another variation of this is shown above.
If you only have one assistant you can always
tighten the bend as shown above. As you can from the picture see at this level the assistant
can
firmly pull Urszula into a backfold without any risk of injury.
After the exercise do frontbend exercise 4.
Exercise 10
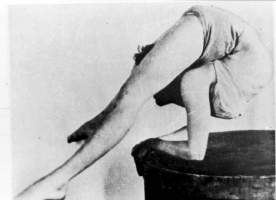
1.Backbend to the floor onto the chest with the hands at the feet.
2. Pull the feet in to alongside the head and touching the shoulders.
3. Relax the back and reach up and grasp above the knee.

4. Pull down with the arms and raise the head as far as you can. Keep the back relaxed at all times. Stay for a count to 20 and stay relaxed at all time.

5. Now slide the feet out to the front and apart while pulling down on the knees until the legs are straight out to the front.
6. Lift the legs up to get out of the tight bend and return to the relaxed position at position 1. Rest for a 10 count then repeat the sequence 15 times.

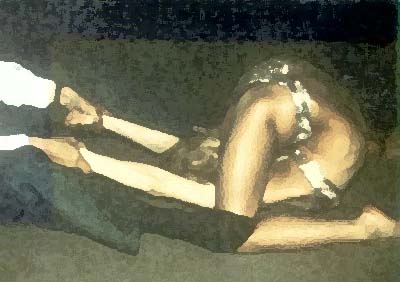
After a while the pose should look like this. Your seat should be firm on your shoulders and your back completely folded!
The exercise can be assisted at all times.
Exercise 11
 or if you’re advanced
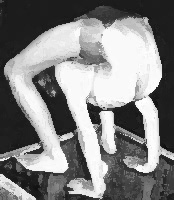
1. Backbend to position 1

2. Lower to the elbows as in position 2.

3. Now capture the feet with the hands as in position 3.

4. Hold on to one foot and raise the other leg to an extended split position as in position 4. Return that foot to position 3. Do the same with the other foot. Repeat until you have done this split action 10 times with each leg. If you need a rest at any stage return to a relaxed position 2.
5. Return to position 3.

6. Now raise both legs to position 6, the backfold, and try to hold to the 1-2-3-4-5 count then return to position 2 for a rest. Do position 6 for 25 repeats. Position 6 can be assisted. The assisten pushes then the legs down slowly.
A position to strive for -
the backfold.
Exercise 12
1. Backbend onto your bed/couch/table and wriggle into a comfortable position with legs hanging loosely.
2. Raise the legs to straight.
3. Grasp the legs and do not bend at the knees and pull slowly in to a 1-2-3-4-5 count to get the head between the thighs (if you can) into a backfold. At all times keep your back relaxed.
Relax to position 1. Do at least 30 repeats.
Advanced variation
1. Backbend to position 1 with legs hanging
loosely and if possible you sitting on your shoulders.
2. Grasp the legs as position 2
3. Bring the hands up to above the knees as at position 3. Pull down hard to close the band and hold the position for a 35 count. Get the head between the thighs (if you
can) into a backfold.
4. Relax to position 1. Do at least 30 repeats.
After the exercise do frontbend exercise 4.
Advanced variation only to be done with assistance when more advanced and successfull with all backbend exercises.

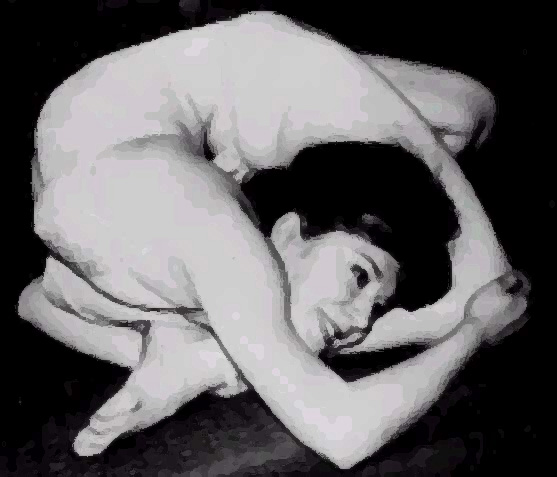
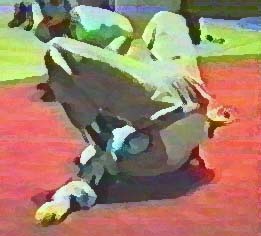
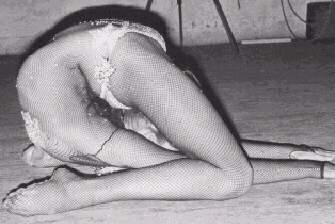
As you have been able to see and feel in the last exercises we have proceeded from backbends to folds, meaning that instead of bending the back you're at this level folding the vertebrae. If you have managed to get the back folded and you can feel your seat against the back well below the shoulders try the position above. In this position you will feel that your back is folded and that the upper back also is bent. You will need assistance to get into this position, but when you're there at this lever you'll be able to stay in it for a longer time. When lying in a backbend on the chest and the legs straight to the front have the person that assists you slide you your arms thru the legs and get them up to about knee position as above. In time you might be able to get into this position by yourself. Then hold yourself like this as long as you feel it's comfortable and do at least 30 repeats.
You can also do this standing. After the exercise do frontbend exercise 4.

Another example of how far this exercise will get you.
The backfold.
Recommended backbend exercise combinations for advanced
This is an advanced serie of positions that you should do when you're able of doing backfolds. It will be very hard on your muscles since you both work on your soupleness, strenght and endurance. Do all of the positions exactly as told and in everyone where possible try to tension your muscles bouncing a little bit from time to time while you hold yourself in the backfold. Also it's important that you increase the time in the positions the more you do this serie reaching the longest possible hold in everyone of them. Between the positions never go out of the backbend unless it's necessary for the change. You are supposed to push the limit here. This might require you doing them together with other things necessary for you to do, but it doesn't mean that it will cause any problems for you. For the most advanced a suggestion can be to fall asleep in the "most advanced" position. This is a natural way for your body to get accomplished to a difficult and before "unknown" position.

1. Start with the backbend to hand, then elbows, then onto a table or floor and grasp the feet by the head.
2. Then, slowly move the legs backwards with the feet captured under the arms and rest the chin.
3. From here release one foot at a time and place it to the front, then the other foot. You should be able to do this without using the hands which should remain under the chin. Stretch the legs to the front and reasonably wide apart.
4. Grasp one leg and bring the other leg up. To give better balance and to not require the leading leg to be kept straight by muscle control, shift the hands so that one is above the knee. Now the hand is holding the leg and there is no strain on the leg muscle.
5. Now move the bent leg to an overhead split allowing the front leg to come off the ground. You should get the rear leg down to the floor into an oversplit before
continuing.
6. From position 5 you need to bring in the front foot because you need the foot to give stability as you bring the rear leg back from the split position to out in front of you. When the leg is out front, foot touching the floor, take the other foot forward as position 3 then shift the hand to the other leg and do the movement with the other leg into the splits. Return to position 3, pull the feet into position 1 then return each leg to the rear so you are face down on the floor, press up and stand.

7. Now do the handstand backbend as above.
8. Lower to the elbows.
9. Capture the feet with the hands.
10. Hold on to one foot and raise the other leg to an extended split
position. Then get the rear leg down to the floor into an oversplit.
Return that foot to position 9. Do the same with the other foot. Repeat until you have done this split action 5 times with each leg. If you need a rest at any stage return to a relaxed position 8. Then return to position 9.
11. Now raise both legs and try to hold to the 1-2-3-4-5 count then return to position 8 for a rest. Do 5 repeats of position 11 exercise.

12 If you haven’t been on a bed or table move to one do the backbend above and wriggle into a comfortable position with legs hanging loosely.

13. Raise the legs to straight.

14. Grasp the legs and do not bend at the knees and pull in to a 1-2-3-4-5 count to get the head between the thighs. Relax to position 12. Do at least 30 repeats and in the last repeat try yo stay in position 14 for as long as you can!
15. Now stand up. With legs reasonably apart arch the back in a standing position reaching back with the hands.
16. Continue with the back bend
17. grasp the legs just below the knees. You now have a locked position that should be steady. (Feet firm, back bent comfortably and hands to the legs).
18. If you have an audience show them how easy it is for you. Just release one hand and raise it straight up and look to one side under the shoulder. Return that hand to the leg and do the same with the other arm returning finally to position 17 again.
19. From position 17 take the hands around the front of the legs at just below the knee and start to pull in to a tighter bend until you get the head between the thighs.
20. Wrap the hands in front of the legs so that you can hold the position more steadily. (The pull in with the hands to the knees took effort and balance; the wrapped arms lock the bend or fold and it is a very stable position. The fold is as tight as you can get and the head is less between the thighs). You should hold this for at least 5 minutes; it is not a quick pull in and release.
While holding the position tension your back muscles from time to time.
21. Relax the bend and move the head to the outside of the legs on one side, grasp that leg with both hands and pull in tight on that side. Change one hand back to the other leg; move the head to outside that leg; grasp the leg with both hands and pull in. Return to head between the thighs as position 20 and pull in once
again, but this time harder (also this time if possible have our assistant pull
a stick or a finger exactly where your back folds while doing position 20). Now do the same thing with the other leg. Repeat 17-21 at least 30 times never going out of the backbend. In the last repeat try to stay in position 20 for as long as you can and the same with position 21!
There are different ways to end this exercise.
Option 1: Return to standing.

Option 2: Drop to the floor into a split and backbend position.


Option 3: Go to the floor in a back bend.

If you have chosen option 3 do the following sequence.